Riešinės Knitted Wrist Warmers
Download printable PDF including full pattern with extra charts and video links.
Materials and Tools
Beginner: 1 skein of Cascade 220 (or equivalent worsted-weight wool), US size 5 (3.75mm) straight or circular needles, approx 160 size 6/0 seed beads
Intermediate: 1 skein of Koigu KPPPM (or equivalent fingering-weight wool), or equivalent fingering weight wool yarn, US size 1 (2.25mm) straight or circular needles, approx 200 size 8/0 seed beads
Advanced: 1 skein of Cascade 220 Fingering (or equivalent light fingering-weight wool), US size 000 (1.5mm) straight or circular needles, approx 240 size 10/0 seed beads Beading needle, crochet hook same size as needles or close
Knitting with Beads
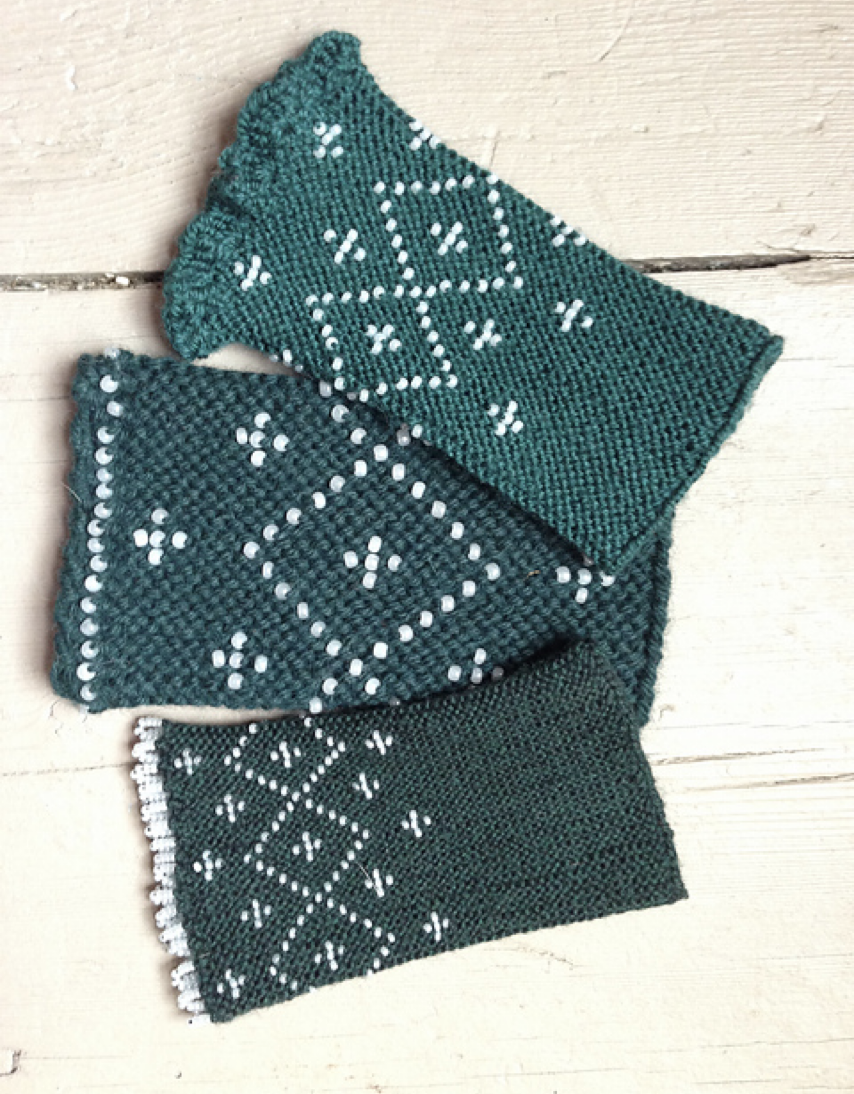
There are many different ways to knit with beads. This is the method that is used in Lithuania when knitting garter-stitch wrist warmers.
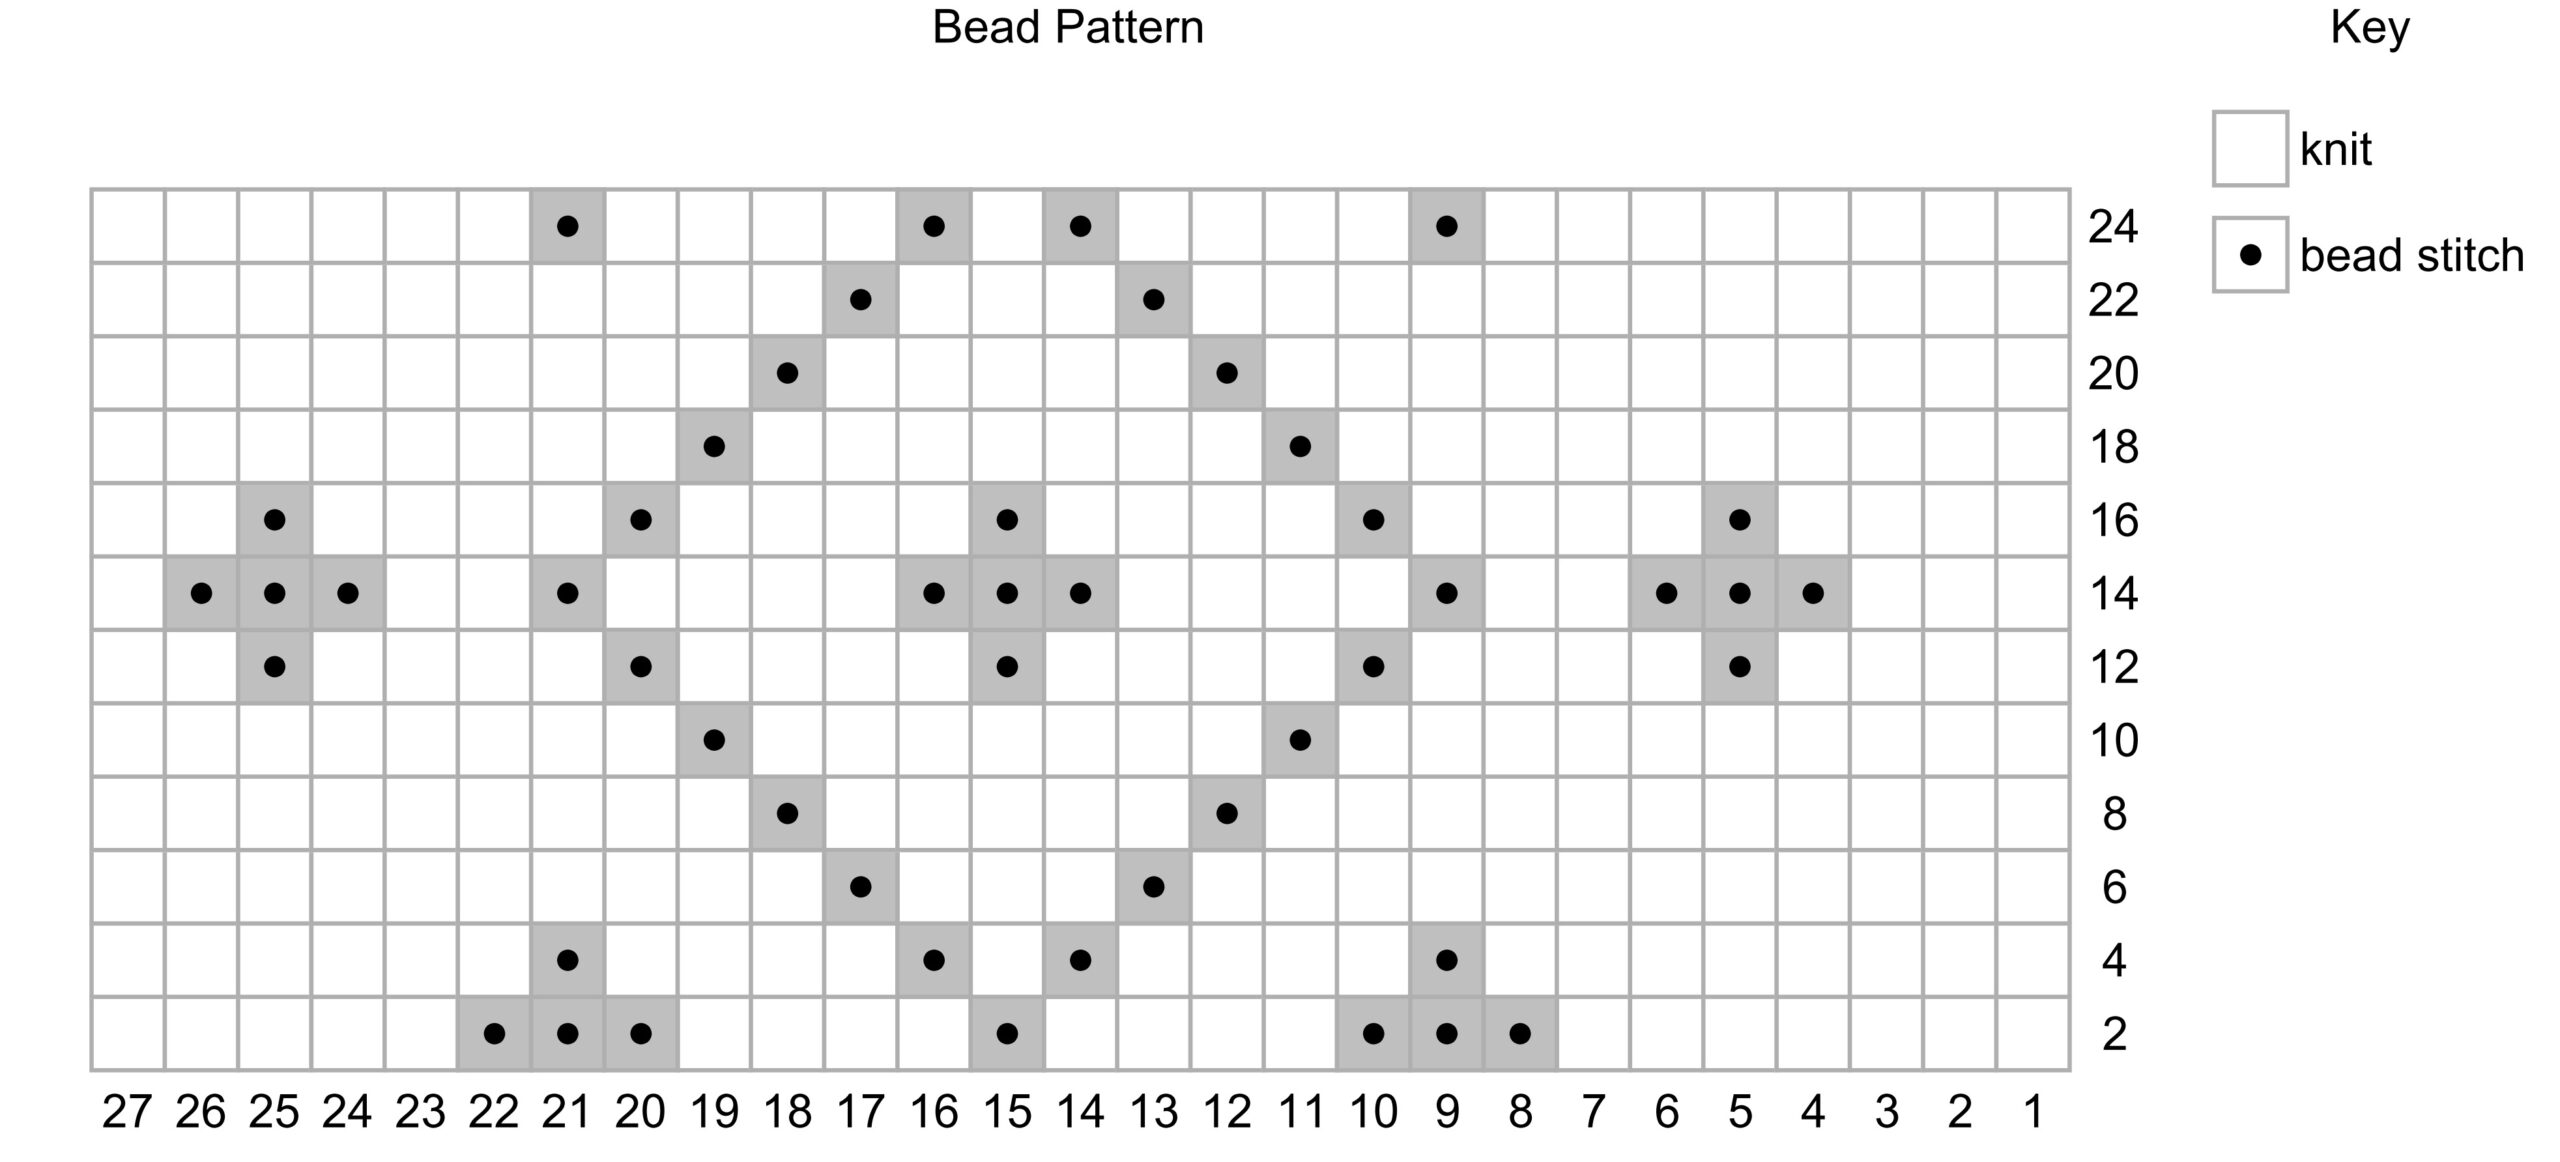
Only WRONG SIDE rows are shown on the charts.
Knit a RIGHT SIDE row with no beads, then work the charted row as follows:
Slip 1 knitwise with yarn in front for a slip-stitch edge (optional). Do not count this stitch.
Knit the plain stitches (green on the chart) normally. When you come to a white square on the chart, slip a bead up to the needles and push it right up against the work that’s already been knitted, then knit the next stitch, pulling it tight to hold the bead in place. This counts as one bead stitch.
The bead sits between two stitches on the needles and will naturally go to the back of the work, which is why we knit in the beads on the wrong-side rows.
Remember, ONLY the beaded rows are shown. Click image to enlarge.
Basic Pattern
Basic knitting skills are required.
Instructions
Make 2 alike.
Using a long tail cast on and two needles held together, CO as follows: beginner 30 sts, intermediate 40 sts, advanced 50 sts.
Row 1 (RS): Knit.
Row 2 (WS): Slip1, knit following chart from right to left, placing beads as indicated. (The same chart is used for all versions)
Row 3: Slip1, knit across all stitches without placing beads.
Rep rows 2 and 3 until wrist warmer is desired circumference to fit around wrist. If possible, end after completing a repeat of the charted pattern.
Bind off.
Finishing
Sew the cast-on and bind-off edges together. Weave in ends.
Crochet Borders
Shells
To be exact in your numbers, you’ll need a multiple of 6 stitches plus 1. For example, 36 + 1 = 37 or 18 + 1 = 19. But since we are crocheting into the edge of a knitted piece, you can fudge on the last couple of shells to make them fit.
• Join the yarn to the knitting (this counts as the first single crochet).
• *Skip 2 stitches, 5 double crochets into next stitch, skip next 2 stitches, single crochet into next stitch, repeat from * to end.
• Slip stitch to first single crochet to join and fasten off.
Picots
Work a row of single crochet, but after every second, third, or fourth stitch (your choice) make a picot as follows: Chain 3, 4 or 5 stitches (again your choice), slip stitch to first stitch in the chain.
Beaded Picots
Attach the yarn as for other forms of crochet. Slide 6-9 beads up to the join, then make a single crochet. Pull the loop very large and draw the whole ball of yarn through it as if you’re fastening off. Repeat from * all the way around and after the last stitch, cut the yarn and pull the tail through instead of the ball, to actually fasten off.
Videos
Thank you to Donna Druchunas for generously sharing her videos and instructions with us. Below are videos for knitting with beads. For more knitting and crochet skills used in making wrist warmers, see this YouTube playlist.
https://youtu.be/GMzBrJWD-1s?si=OhPj7Gy_KRUG7Kp5https://youtu.be/GEm3O9C2O8U?si=_w9xXaMhYOKbVXHI

 An artisan specializing in knitting. She taught a knitting workshop at the LTFAI AGM several years ago and fell in love with the organization. Not only is she a prolific author of knitting books, with “The Art of Lithuanian Knitting” under her belt, but she’s also the creative genius behind our social media presence.

 Ramune is a translator and editor, who worked with the Canadian Lithuanian Weekly Tėviškės žiburiai as managing editor for over 20 years.